Conveniently enough, the tech news/gadget blog "Tested" is having an Adam Savage and Jamie Hyneman costume contest. Our Halloween party isn't until Saturday, which is after the contest. So Kelly McCulllough and I ventured out to a friend's place who just happened to have a trampoline a kiddie pool, and a propane tank available.
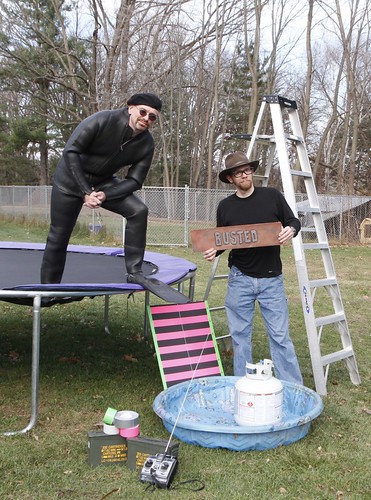
To put this photo shoot together, all we really needed to acquire new was Kelly's beard. Although I did have to build the "BUSTED" sign. But that was made from materials I already had on hand.
So let's say you're wanting to participate in the tested contest. Or perhaps you just want a giant "BUSTED" or "CONFIRMED" sign you can toss out during debates. Well today's your lucky day.
I started planning the sign about three weeks ago. A whole lotta searching on the interwebs yielded no specific information on the actual signs used in cutscenes on the show. The Discovery channel offers a metal version of the sign, but the font isn't right. It was also kinda pricey. If anything, my Halloween costuming mission statement has always been one of creative frugality.
I was going to try and watch as many Mythbusters episodes as possible and photograph the TV paused to show each sign so that I could estimate the dimensions and get the font to look right. But once I discovered that, unlike DVDs played on your computer, taking a screenshot (Shift-CMD-3 on a Mac) of a movie playing via Netflix in a web browser would actually work. So now I had a batch of screenshots featuring many views of the signs. In order to match the sign and estimate its dimensions, I tried to use 'head-on' shots to minimize perspective distortion. Then I imported them into photoshop to correct for other distortions and line up each sign's text so that when built, they'd be all to about the same scale.

Random Trivia (TM) item: there are at least two welded steel versions of the "CONFIRMED" and "BUSTED" signs used in the show. I'm not sure about "PLAUSIBLE."

Based on a few views, I estimate these signs are something around 5–6" tall by 18–21" wide and the lettering is probably about 1/2" wide. My guess is they cut the pieces out of 1/8" thick plate steel and used fairly standard sheet stock dimensions. So I went with 6" tall by 24" wide, because I wanted a little more room on either side. Plus it made the maths easier...
To make the back, I used 6mm (1/4") thick "Depron," which is an expanded polystyrene (EPS) foam product popular with remote controlled airplanes (link to source). I went with EPS because 1) I had several sheets of it on hand and 2) It's lightweight, has a slight "metallic" appearance, and was easy to work with. I cut the backs to size and super-glued some basswood strips to the backside to provide some extra rigidity. I was going to be painting these things and I didn't want the drying paint to warp the shape.
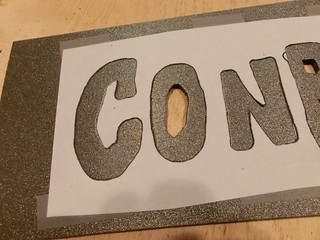
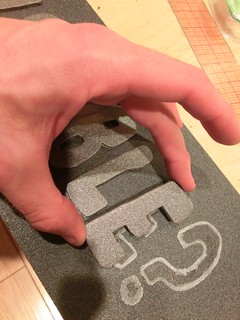
From my photoshop files, I printed off each of the words at full size. I used the printout as a cutting template that I just taped onto sheets of 3mm (1/8") Depron and cut out using a hobby knife.
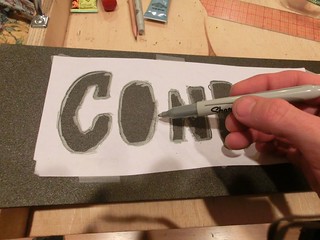
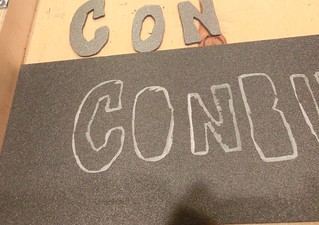
Then I used the cutout as a lettering position guide on the 6mm backing sheet. I (appropriately) used a silver marker to mark the positions. Although if you use any non water-based marker on Styrofoam, check to see if the solvent used in the marker dissolves the plastic.
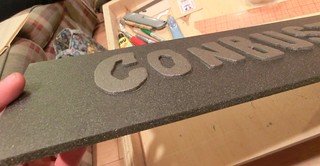
To glue the letters onto the backing, I used UHU's "Creativ" contact cement - although I think UHU "Por" is the closest product currently available. Again, something that wouldn't be too brittle when set, not dissolve the plastic and not soften or fall apart if wet (from painting).
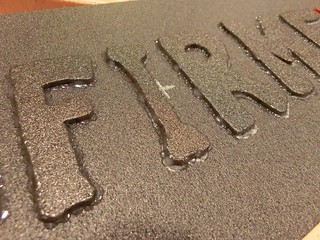
And the weld bead that gives these signs their characteristic appearance is just white glue. I thought about hot-melt glue (low-temp), which might look more like molten metal, but with the styrofoam, I figured there was too much risk of melting the plastic. So I used white glue, added in multiple layers so that the drips and blobs wouldn't flow into each other too much, giving a reasonable appearance of forming a weld.
Once the glue was dry, it was time for paint. Watching the cutscenes, it's pretty obvious they have some where the signs are rustier and some where they've obviously burnished the metal to a good sheen. I decided that a rustier sign would be easier to make. After some experimentation, I found that some kind of metallic "steel" or "gunmetal" color looked good and provided a good base layer for additional washes of different colors. Once the base was in, I would stipple and drybrush some oxide red patches where the rust was going to be really heavy.
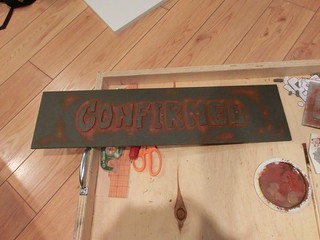
Then it was making layers and layers of rusty red, brown, yellow washes to build up complex color textures that gave the appearance of rusty steel. I followed these washes of rusty colors with an overall wash of india ink to darken up the low spots. Drybrushing some light red/yellow, and in some places silver, over this really helped convey the sense of weathered metal.

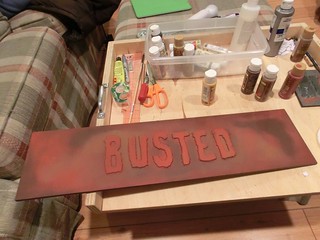
For the "busted" sign, I started with a red oxide base layer, since this was going to be a really rusty sign.
Then some darker brown areas. I tapped most of the paint off the brush by wiping it on some cardboard so that I could control how much paint I was putting on the surface by pushing harder or backing off.
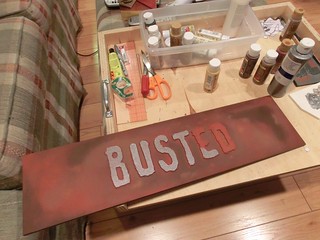
Then some metallic silver paint to represent the polished metal surface. This pearlescent silver wasn't the best, as little sparkly flakes kept wiping off and getting onto other surfaces.
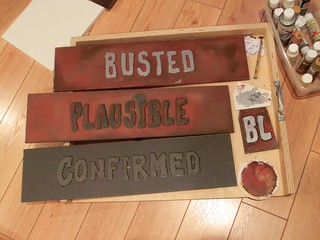
And here we have a complete set. They're lying on top of a portable work space I made up so I can watch TV or move my project stuff around more easily. Made watching the show and working on the signs at the same time very easy. That little "BL" on the right side was a test piece for checking out colors and suchlike.
And then the finished product, in its natural habitat. But, who wants to settle for just "CONFIRMED" or "BUSTED"? Even "PLAUSIBLE" has its limitations. I wanted a sign that would cover every possibility:
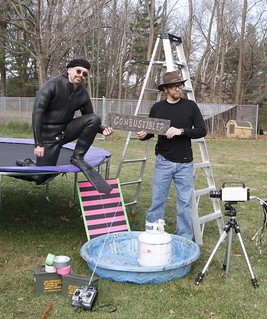
And like I mentioned before. The only thing that had to be acquired new was Kelly's beard. I'm not sure what that says about us (other than something about geekiness and hairstyling).
Note: since the show is a commercial adventure, and I'm sure the actual footage is a copyrighted thing, I'm not going to share more or larger screenshots - they're easy enough to acquire on your own. I also make no claims to own the font style or design of the text. But, if Beyond Belief Productions wants to give me credit for making up the word "CONBUSTIBLE" I'm fine with that :).
No comments:
Post a Comment